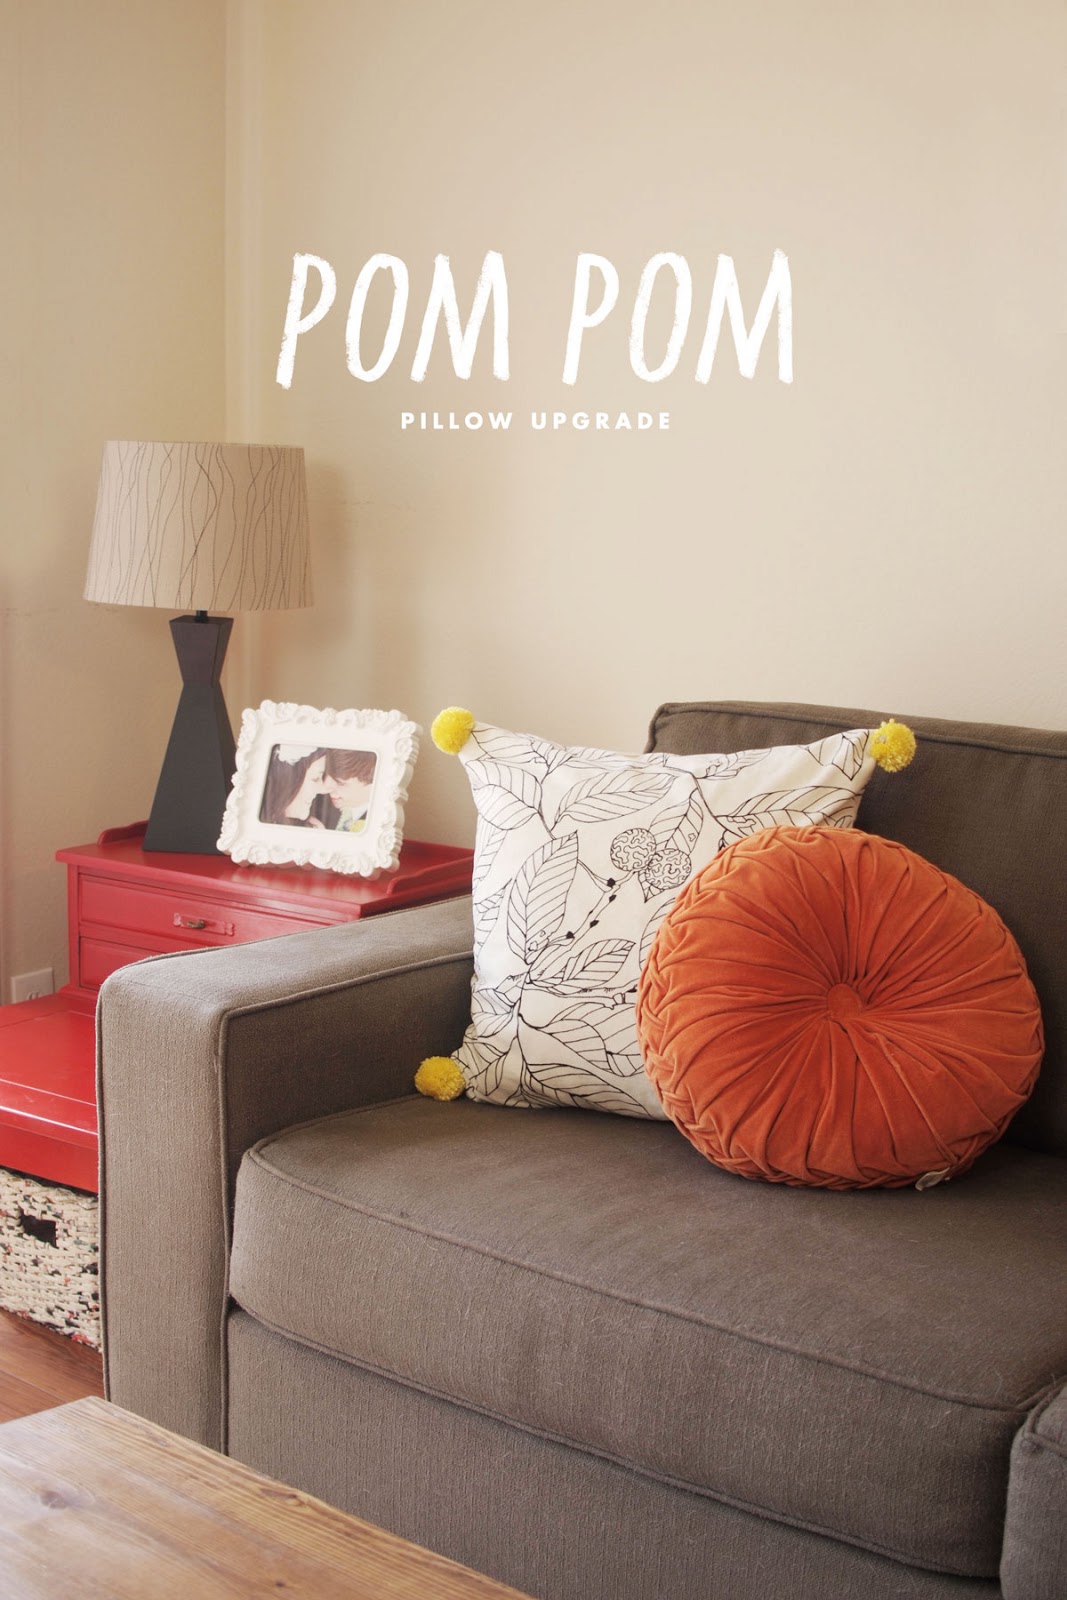

I’ve been dreaming of getting a pom pom maker for a while now. I finally got one from Michael’s a few weeks ago to make pom poms to add to the tops of the party hats for Pixel’s Birthday Party. I needed another excuse to make some more poms poms so I came up with this pom pom pillow upgrade! It’s super simple and can be done pretty quickly.
You will need:
- A pillow in need of upgrading (mine is from ikea)
- scissors
- soft yarn
- safety pins
- pom pom maker (optional)
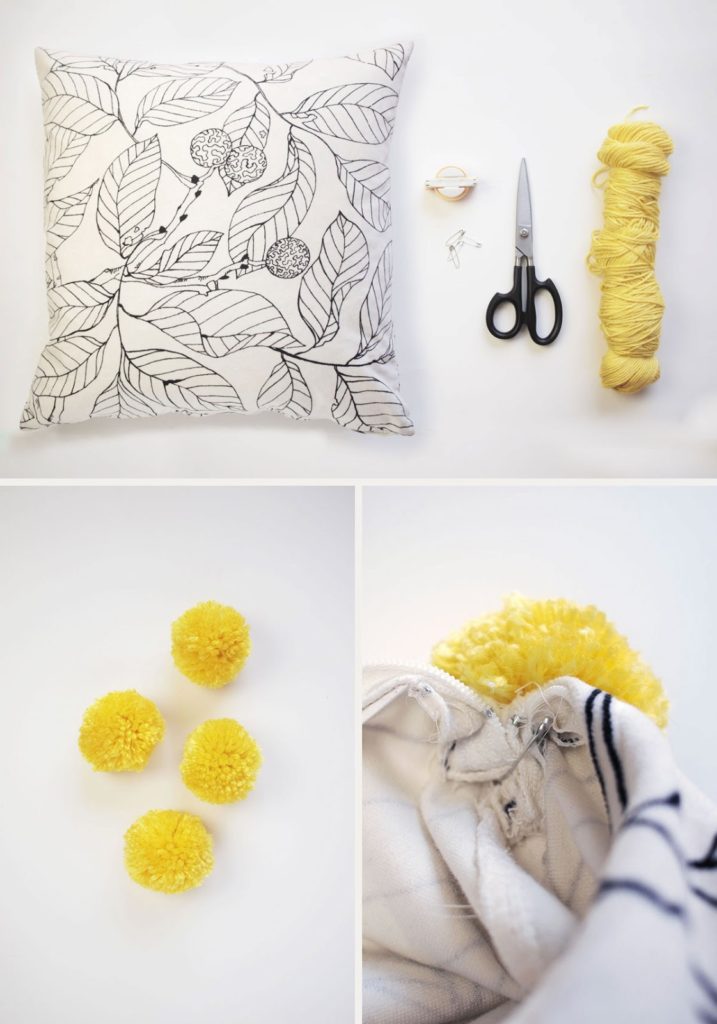
Step 1: First make your pom poms using your pom pom maker. Have fun with it! You could do multiple colored pom poms or even try adding more than one pom pom on each corner.
If you don’t have a pom pom maker you can use your hand by following this methed.
Step 2: Take your pillow out of the cover. From the inside of the cover pin each pom pom to a corner.
Step 3: Stuff your pillow back in and enjoy your upgraded pillow!

Note: You can also sew the pom poms on but I like to wash my pillow covers pretty often. So these can easily be removed when they need a quick cleaning.